
Fishing is a relaxing and rewarding hobby, but a damaged rod handle can quickly ruin your day on the water. Whether you’re an avid angler or a casual fisherman, knowing how to perform a fishing rod handle repair can save you time and money. At Fishing Gear Shops, we understand the importance of keeping your gear in top shape. A broken or worn handle doesn’t mean you need to replace your entire rod. With a few simple tools and techniques, you can restore your fishing rod to its former glory. This guide walks you through easy, step-by-step fixes that work, ensuring you’re back to casting in no time.
Why Fishing Rod Handles Get Damaged
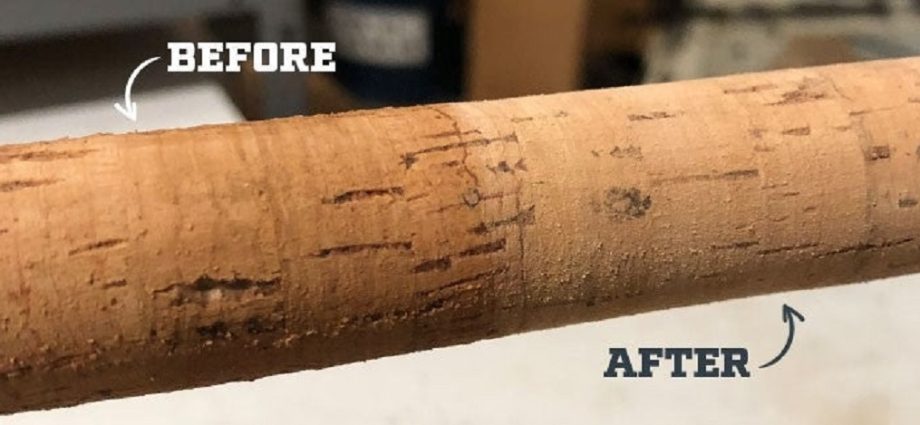
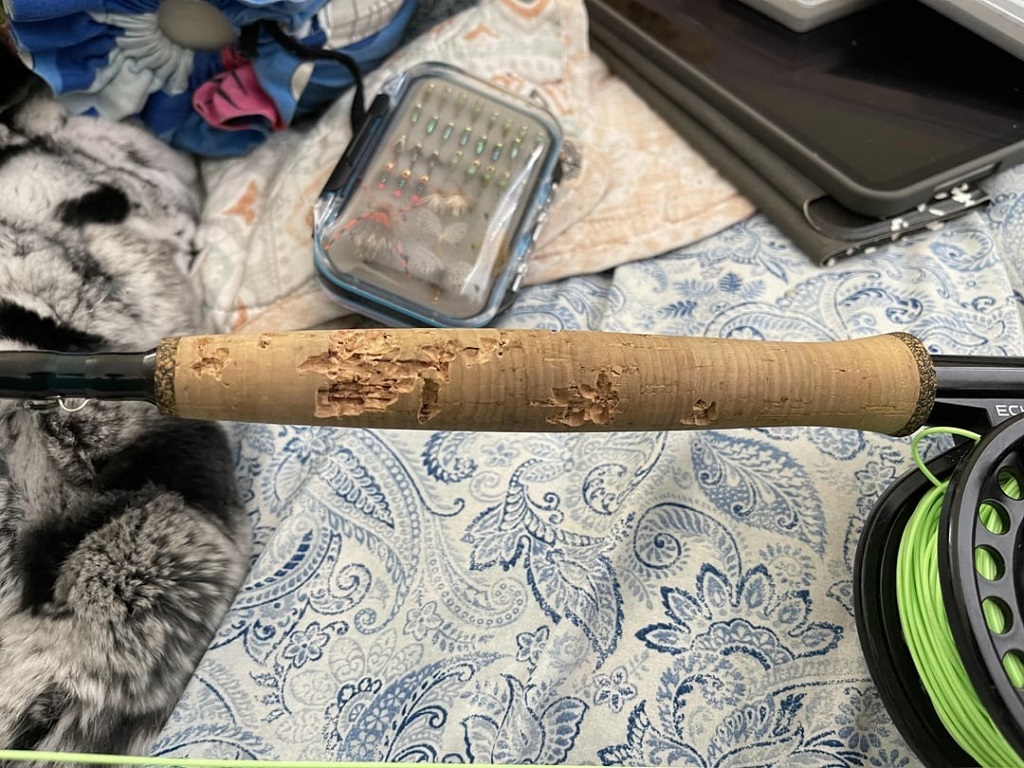
Fishing rod handles endure a lot of wear and tear. Constant exposure to water, sun, and rough handling can cause materials like cork, foam, or rubber to crack, fray, or loosen. Additionally, improper storage or accidental drops can lead to dents and splits. Understanding the cause of the damage helps you choose the right repair method. For instance, cork handles often crumble over time, while foam grips may tear. Knowing how to address these issues is key to maintaining your rod’s performance.
If you’re looking for high-quality replacement parts, Fishing Gear Shops offers a wide selection of handles to suit any rod type. Their products make repairs straightforward, even for beginners. Before diving into the fixes, let’s explore the tools you’ll need to get started.
Tools and Materials for Fishing Rod Handle Repair
Gathering the right tools is the first step to a successful repair. Fortunately, most items are affordable and easy to find. Here’s what you’ll need:
- Sandpaper (medium and fine grit)
- Epoxy glue or two-part adhesive
- Replacement cork, foam, or rubber grip material
- Utility knife or razor blade
- Masking tape
- Measuring tape
- Cleaning cloth and rubbing alcohol
- Optional: heat gun for shrinking grips
Having these tools on hand ensures you can tackle most handle repairs. If you’re unsure about sourcing materials, retailers like Bass Pro Shops offer rod-building supplies that are perfect for DIY fixes. Now, let’s move on to the repair process.
Step-by-Step Guide to Repairing a Fishing Rod Handle
Repairing a fishing rod handle is easier than it seems. Follow these steps to restore your rod’s grip and functionality.
Step 1: Assess the Damage
Start by inspecting the handle. Is the cork cracked? Is the foam torn? Or is the grip loose from the rod blank? Identifying the issue determines your approach. For minor cracks, you may only need filler. However, severe damage might require a full handle replacement.
Step 2: Remove the Damaged Handle
Use a utility knife to carefully cut away the damaged grip material. Work slowly to avoid damaging the rod blank underneath. If the handle is loose but intact, gently pry it off. Clean the exposed rod blank with rubbing alcohol to remove dirt or adhesive residue. A clean surface ensures better adhesion for the new material.
Step 3: Prepare the New Handle Material
Measure the length and diameter of the original handle to ensure the replacement fits properly. If using cork rings, sand them lightly to smooth out rough edges. For foam or rubber grips, cut the material to size with a utility knife. If you’re using a pre-made grip, check that it slides onto the rod blank snugly.
Step 4: Apply Adhesive
Apply a thin layer of epoxy glue to the rod blank where the new handle will sit. Spread it evenly to avoid lumps. If you’re using a shrink-wrap grip, a heat gun can help secure it without glue. However, epoxy is best for cork and foam handles to ensure a strong bond.
Step 5: Install the New Handle
Slide the new grip material onto the rod blank. For cork rings, stack them tightly and press them together. If using a single-piece grip, align it carefully and push it into place. Use masking tape to hold the material in place while the adhesive cures. Let it set for 24 hours for a secure bond.
Step 6: Sand and Finish
Once the adhesive has cured, sand the handle lightly with fine-grit sandpaper to smooth out any imperfections. Wipe it down with a damp cloth to remove dust. Your rod is now ready for action!
Tips for a Professional-Looking Repair
To make your fishing rod handle repair look seamless, keep these tips in mind. First, work in a well-ventilated area when using epoxy to avoid inhaling fumes. Second, double-check measurements before cutting new material to avoid waste. Finally, test the rod’s balance after the repair. A poorly fitted handle can affect casting accuracy. If you’re new to repairs, practice on an old rod first to build confidence.
Common Mistakes to Avoid
Even simple repairs can go wrong if you’re not careful. One common mistake is using too much adhesive, which can ooze out and create a mess. Another is rushing the curing process—always let the epoxy set fully. Additionally, avoid using low-quality materials, as they may not withstand regular use. Investing in good supplies from trusted sources like Outdoor Life ensures durability.
Maintaining Your Fishing Rod Handle
Prevention is better than repair. To extend the life of your rod handle, store your rod in a protective case when not in use. Avoid leaving it in direct sunlight or damp environments, as these can degrade materials. After each fishing trip, clean the handle with mild soap and water to remove salt or grime. Regular maintenance reduces the need for frequent repairs.
When to Replace Instead of Repair
Sometimes, a handle is too damaged to fix. If the rod blank itself is cracked or the handle is completely disintegrated, replacement is the better option. Fortunately, replacing a handle is often more cost-effective than buying a new rod. Check out Fishing Gear Shops for durable, easy-to-install replacement handles that match your rod’s specifications.
Read More Also: What to Expect on Your First Day in a Carer Job
Conclusion
Repairing a fishing rod handle is a practical skill that any angler can master. By following these step-by-step instructions, you can fix cracks, replace worn grips, and restore your rod’s performance. With the right tools and a little patience, your fishing rod will feel as good as new. Regular maintenance and careful handling can prevent future damage, keeping you on the water longer. For all your fishing rod repair needs, trusted retailers like Fishing Gear Shops have the supplies to make the process smooth and affordable.
Read More Also: Get better results from outdoor advertising with these tips
Frequently Asked Questions
Can I repair a fishing rod handle without replacing it?
Yes, minor cracks or chips in cork or foam handles can be fixed with epoxy or filler. Sand the area lightly, apply adhesive, and let it cure for a smooth finish.
What’s the best material for a fishing rod handle?
Cork is durable and comfortable, while foam is lightweight and affordable. Rubber grips are great for wet conditions. Choose based on your fishing style.
How long does a fishing rod handle repair take?
Most repairs take 1-2 hours of active work, plus 24 hours for the adhesive to cure fully. Plan ahead to avoid rushing the process.
Can I use a heat gun for all handle repairs?
A heat gun works well for shrink-wrap grips but isn’t suitable for cork or foam, which require epoxy for a secure bond.
Where can I find replacement handles?
Fishing Gear Shops offers a variety of replacement handles. Local tackle shops or online retailers like Bass Pro Shops also carry quality options.
Comments are closed, but trackbacks and pingbacks are open.